|
First,
we want to recognize the folks who made this project possible for our
crew:
Harry
Bohlman and Helen Hopkins, owners of 4H Timber Harvesters, Pipersville,
PA.
Even
though they were not successful in a bid for work elsewhere in the parks,
they volunteered their time and donated the considerable resources, time
and talent to perform what I can only describe as 'magic'. They and
their 2 Percherons, Toby & Tom, delivered the 3 telephone poles to
within 20 feet of where we were going to be working. The crew is in
their debt - big time!
|
 |
The
work began the week before the scheduled work trip weekend. Harry,
Helen, Tom & Toby arrived at the Steam Mill campground in Stokes on
Wednesday. They unloaded the horses, tied them out, and then
surveyed the delivery route. The route was decided upon and any
small blow downs and such were cleared out by the park's people, Dennis
& Wes and Harry. [photo by Monica Resor] |
 |
Tom
& Toby are an experienced team. Each has their own personality,
but together, they could probably move a mountain. And after a day
commuting in their trailer and then tied up all night, they were ready to
GO! [photo by David Day] |
 |
The
poles had been dropped along side the road and were waiting to be
delivered. Here, Helen is binding one of the poles to the
drawbar. Harry is checking the harnesses. One thing that was
amazing was that all that chain and steel drawbar getup was hooked to a
leather harness set. [photo by David Day] |
 |
Once
a pole was chained to the drawbar, Helen began driving the horses up the
road to where they would enter the woods along the Parker Trail.
[photo by Monica Resor] |
 |
The
hardest part about this photo was keeping them in sight! Those two
horses took off with that 2500 pound pole like they were out for a buggy
ride. [photo by David Day] |
 |
At
one point they had to stop to adjust the chain binding the pole to the
drawbar, and Larry was able to run and get ahead of them for this photo.
[photo
by Larry Wheelock] |
 |
I
barely got this shot off before they went by. [photo by
David Day] |
 |
Considering
they were working with 'only' 2 horsepower, they moved easily through the
woods. [photo by Monica Resor] |
 |
Given
that they were basically just dragging the poles, there was an amazingly
small amount of impact from the entire process. As Percherons go,
Tom and Toby were a bit on the light side, minimizing how much impact their feet
made. [photo by Monica Resor] |
 |
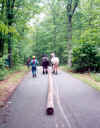
And
then, another view of them zooming away through the woods ahead of
me. It took them under an hour to go the 2 miles from the road to
the worksite. In later discussions, it turns out that these poles
were a small load for the two horses - compared to the fresh cut trees
they normally hauled. For them, this was a light
day! [photo by Larry Wheelock]
Two horsepower - indeed! Ha! |
 |
Truth
be told, we did have another 18 horsepower working with us on the
project. Here, Dennis stands by his Mule. He drove all the
many tools and the balance of the materials in for us. This mule was
no match for the 2 horses, however, when it came to moving the
poles. Dennis was with us both days of the project and was a huge
help, pitching in with the work as well as providing
transportation. [photo by Monica Resor] |
 |
On Saturday, the crew turned out to begin working on the bridge.
We
first cut the old bridge in two the long way with at chainsaw and dragged away half of it, leaving the
rest as a way across the stream - and as a ramp for
delivering the new poles into place. In this picture, the second
pole is starting to be dragged down. You can see the old bridge
'ramp' in the background. [photo by Monica Resor] |
 |
Our
blessings to Sandy Parr for his insight at keeping part of the old bridge
as a delivery tool. With Dick working away on the Grip-Hoist, all
that had to be done was to use a rock bar to free up the leading edge of the pole on
the occasions when it got hooked in one of the gaps of the old bridge
deck. [photo by Monica Resor] |
 |
As
each pole was dragged down and across the old bridge deck using the
Grip-Hoist, we moved remainder of the old bridge over another pole's
worth. Here, Don and I are using rock bars to steer the third pole
and (hopefully) keep it from dropping off into the stream. [photo by
Monica Resor] |
 |
Here, the
first two poles are roughly in place and the third is parked on the old
bridge. Don (near end) and Monica & I (far end) are checking the
second pole's elevation. Once we were ready to place the pole, all
that was necessary was to use the rock bars to (gently) roll the pole off
the bridge and into place. [photo by Larry Wheelock] |
 |
Each
pole end was set in a 'pocket' of rock, set into the bank as an abutment.
As the poles are place, they must be raised or lowered so that their tops
end up at the same height. That is done by lifting the pole end with
a rock bar and re-setting the stones in the 'pocket' until the desired
altitude is attained. Dick and Monica had the lifting duty, while I
fiddled with the rocks underneath. [photo by Larry
Wheelock] |
 |
Once
all three poles were placed and leveled, the decking could begin.
First all the boards were tack nailed in place. As each one was
done, whatever shimming was needed for the middle pole was slid into place
and nailed down. Unfortunately, the poles were not perfectly consistent
in their diameter, so even though parts of them were even, some were
not. Here, Larry is fitting a piece of extra deck board in as a
shim. [photo by Monica Resor] |
 |
All
the deck boards had been pre-cut to size, but they had to be fitted and
spaced properly. Here, Roland and Shawn are setting the last couple
of feet of deck in place. A 1/2" gap was left between each board to
permit draining rain and snow and to avoid collecting small bits of woods
- all to minimize the likelihood of having the boards rot out.
[photo by Monica Resor] |
 |
Here Ann & Valerie are in the
process of drilling and screwing down the deck boards. These two
ladies were on their first work trip, but they pitched in like old
pros. In no time at all, they had completed the final fastening
process. [photo by Monica Resor] |
 |
Now
that we had a nice new bridge to walk on, we did not need the old one any
longer, so we ripped the deck off of what was left of it and dragged the
old poles up onto the bank. They will be cut into smaller pieces and
used to make waterbars and check dams elsewhere on the trail. Here,
Dennis and I are guiding one of the old poles as it is being winched up
the bank and out of the way. [photo by
Larry Wheelock] |
 |
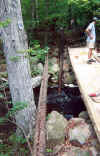
Each of the old bridge's old poles had to be pulled out of the river and up the bank for recycling. At the far end of the bridge is Dick, working the Grip-hoist winch we used to pull the poles in and out of position. [photo by Monica Resor] |
 |
With the last pole from the old bridge waiting, the end of the middle pole drops into the stream as it is winched away. [photo by Monica Resor] |
 |
With the bridge all finished 'all' that remained was to build up the ground for the approach to the bridge at each end. This was done by building low stone walls on either side of the outer poles and filling in the space between with small rocks and crushed gravel. Here, Ann is pounding some rocks for crush-and-fill. [photo by Larry Wheelock] |
 |
The same thing had to be done at the far end. Here, Marshall is taking out his frustrations with the 10# sledge hammer. [photo by Larry Wheelock] |
 |
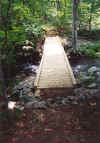
Here is the finished bridge, from the north end. Notice the curbing edges. This bridge is used in the winter by cross-country skiers (and the occasional snowmobile), so the curbs will help to keep the snow pack on the bridge deck for them. Also, notice the crush-and-fill approach to the bridge. The broken rock will quickly fill in with dirt and other forest litter, quickly attaining a solid, smooth walking surface the will not easily erode. [photo by Monica Resor] |
 |
And again the finished bridge, this time from the south end. This trail is not part of a handy loop route, but it does go through some very interesting areas. Check it out, and take a walk on our bridge! [photo by Monica Resor] |

|
There are more photos coming - as soon as I get them, I will fill in the process so you can see the whole job.
|


