Summer 2001 Monica took most of these over a couple of our 4-day weekends on the site. It took so long to bring in the machinery, that we scheduled Thursday through Sunday or Saturday through Tuesday 'weekends'. Many folks showed up for multiple days at a time, camping overnight to avoid the 'commute'. Those who could arrange for weekdays, did -- and we thank you.

The centerpiece of this project is 'the bridge'. This was built in 1996 to cross the river. I call it a 'flying Adirondack bridge'. It looks and is built very much like one of the classic bridges, except that it is 20' in the air on large steel cables and telephone poles. There is a staircase up from the ground level at each end, which connect into the boardwalk and trail system.
( Currently, the Trail Conference's website has some of the best pictures of the bridge, but I will try to get some more detailed ones, soon. )

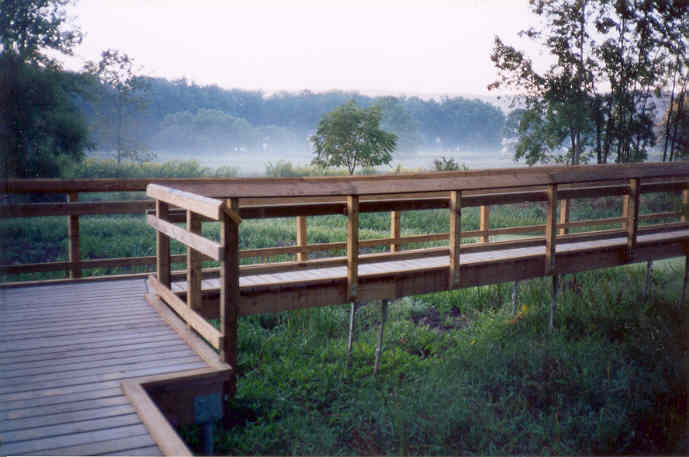
A view from the bridge. Looking west along the river bed. This looks all quite peaceful and innocent at this point in a very hot, dry, late summer. But when the spring melt waters and the April showers get together (and the occasional hurricane) this quiet little stream becomes quite the roaring flood water. I am told there is some pretty good fishing to be done here, as well.
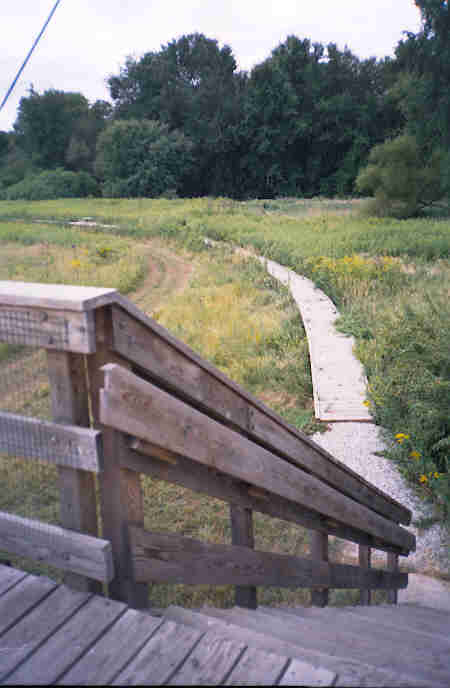
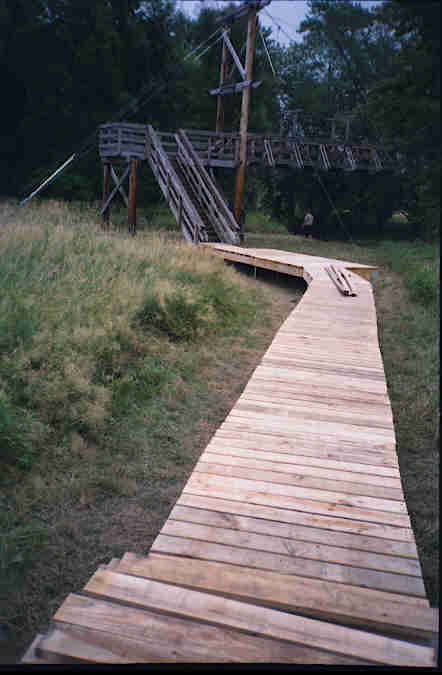
At each end of the bridge, a staircase drops down to the trail. Here is the north end stair, which drops to a short gravel pathway which then ramps up to the boardwalk's design altitude. Yes, altitude. The engineer's drawings specify the boardwalk decking as being above the 'record flood' level of around 394' above sea level. This level is followed throughout the project. When the ground pops up onto an 'island', the boardwalk transitions into conventional trail. Then, when the ground falls away again, the boardwalk re-starts. All-in-all there is about 500' of conventional trail, and nearly 2/3 mile of boardwalk.[photo: Monica Resor]


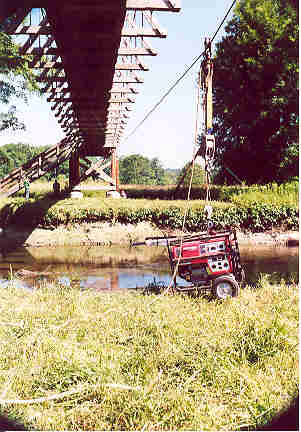
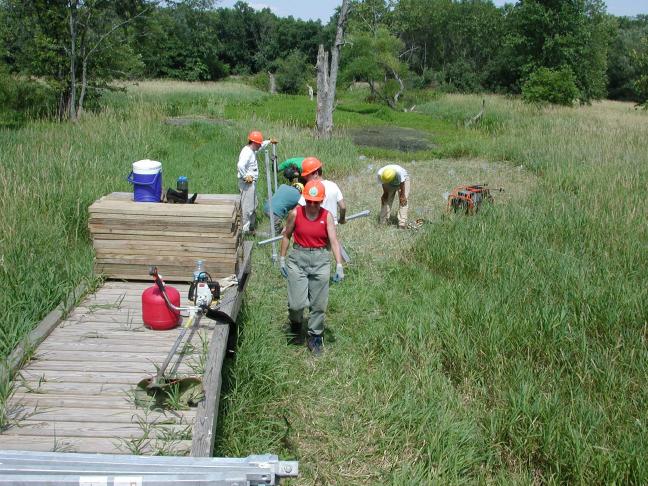
At the start of the boardwalk work trips, all the equipment, tools and machinery were brought in from the north end of the project. A steel highline was set up under the bridge, using the bridge structure as endpoints. From that, we could suspend things like this 5000w generator, a hydraulic pump, the hydraulic auger driver, power tools, gas tanks, etc.. Then, they could just be 'floated' across the riverbed to the bank 50' away. Take a look at the underside of the bridge! What a beautiful piece of work this was. Wes Powers (NJDEP Regional Maintenance Coordinator) is the project 'boss' and saw this through to completion (I think) as a personal 'mission'. He had help from the utility company that supplied and installed the poles; but most all of the rest was done by old fashioned smart manpower!

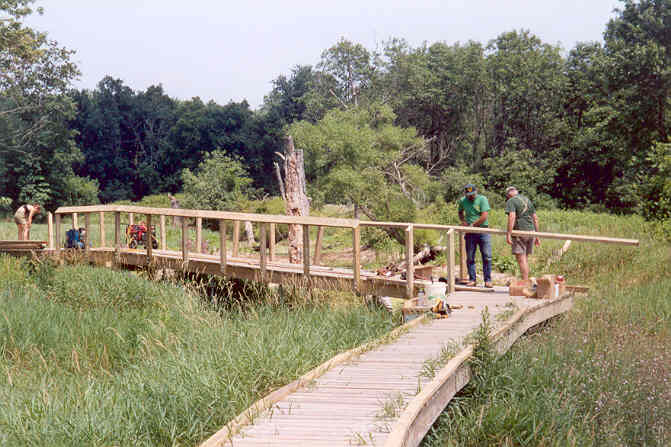
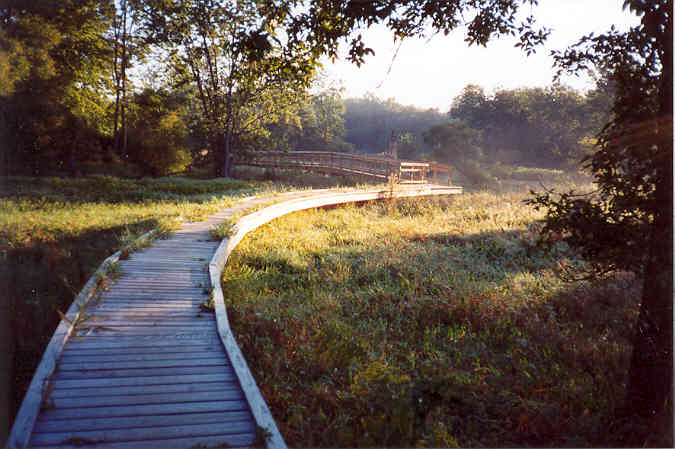
This is a view from the south end of the suspension bridge which crosses the Pochuck River about a third of the way from the north end of the wetlands area. From this point, there is probably about 3/5 of a mile to go, until the trail gets out to the road crossing. To the right of the boardwalk is the area where much of this year's materials were air-lifted in by the Forestry Service.
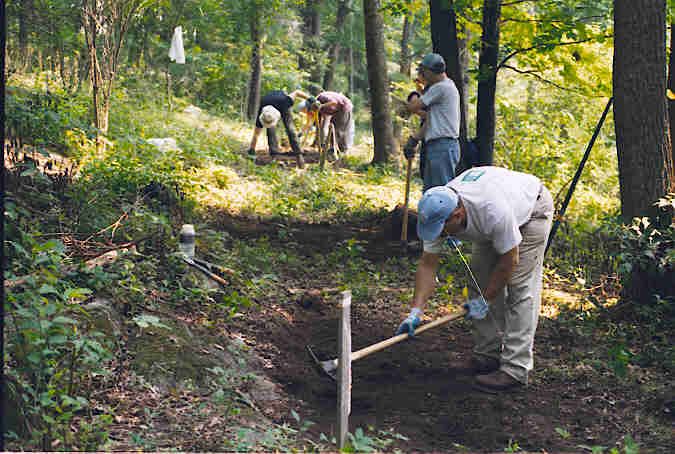
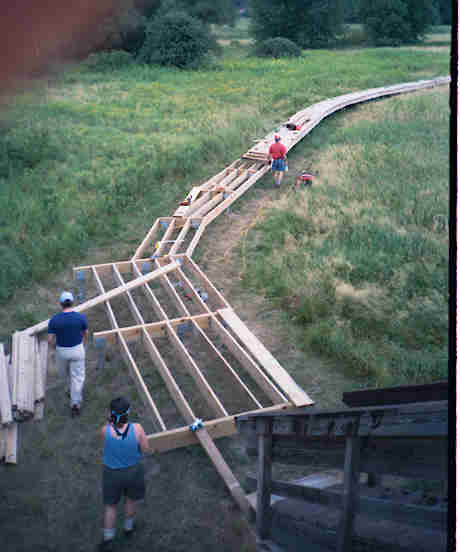
From the bridge, looking south. This was our (West Jersey crew) first part to work on. This last 100' or so had to be completed and brought up to, and connected with, the bridge's south end staircase. Here we are beginning to lay out the positions for the pilings. We also had to carry the materials from out in the field (to the right) where they had been air-lifted and dropped off. 'The Ants Go Marching Two by Two'......
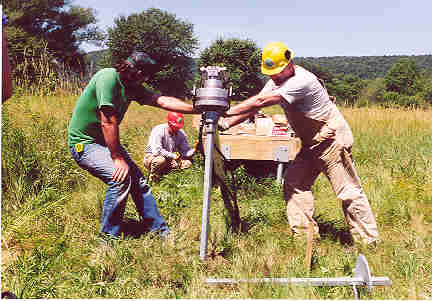
The pilings (one is laying down across the bottom of the frame) are large augers on a 6' steel bar. The bar is 1.5" square and weighs about 60 pounds. The hydraulic driver is actually a slow, immensely powerful drill. It sits on the top of a piling shaft with a socket, and drives the auger into the ground. 5' extensions are bolted on as needed to drive the auger down until the design-specified conditions are met.

With foot-operated hydraulic valves, the drill is run forward and back. One or more persons steady the drill head in place. The head takes about 3 strong, tall persons to place it -- it is very heavy! It has a 'tail', which you can see, which is chained to a prior piling to prevent the drill head from turning, rather than the auger. The design target criteria is for 800 foot-pounds of rotational torque; there is no way that people could hold it. At that point, the engineers have determined that the piling is into a firm, secure strata below the level of the swamp. Some of them were driven as deeply as 24 feet.
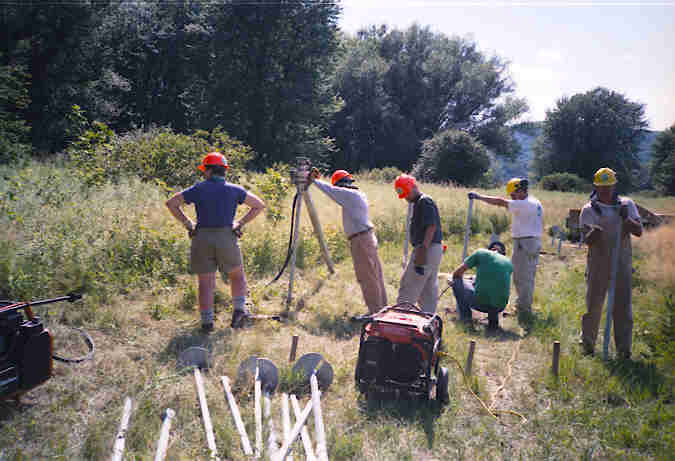
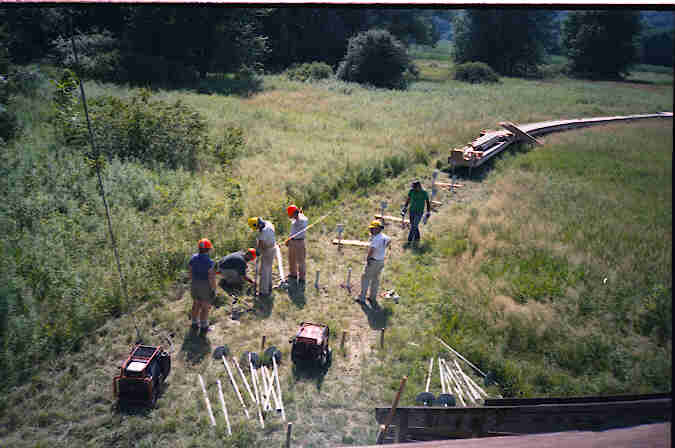
As the pilings are driven in, the rest of the team begins staging more of the materials from the fly-in zone. Wes Powers (that's him in the green DEP shirt) is also using his infra-red surveying system to determine the level to cut off the excess piling at.
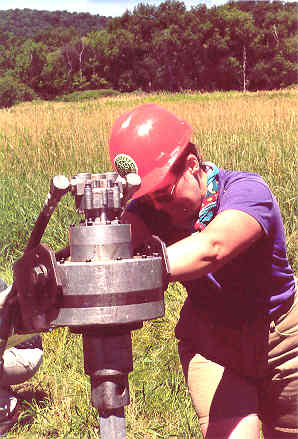
Here is a close-up of the job of wrestling with the drill head. We worked in rotating teams of 3-4 people to try to keep the drill going as close to full time as possible. As the pilings were screwed into the ground, they would hit the odd stone (or mountain top) and the whole thing would go off of vertical. Not that any person could stop it, all you could do would be to try to lean it back up as close to vertical as it would go. Not only was this drill head heavy, it got quite hot after awhile; so it was quite the tough competitor. Mary-Nell, here, was absolutely up to the task.

Once a piling was driven to the desired torque point, you were done. If you fell below the correct altitude, though, you would have to add an extension and drive it in until the joint was below the ground. This one will need another length.

After the piling is set and the desired height marked, a portable band saw is used to cut off the extra piling bar stock. Oh, what a difference having the right tools makes!

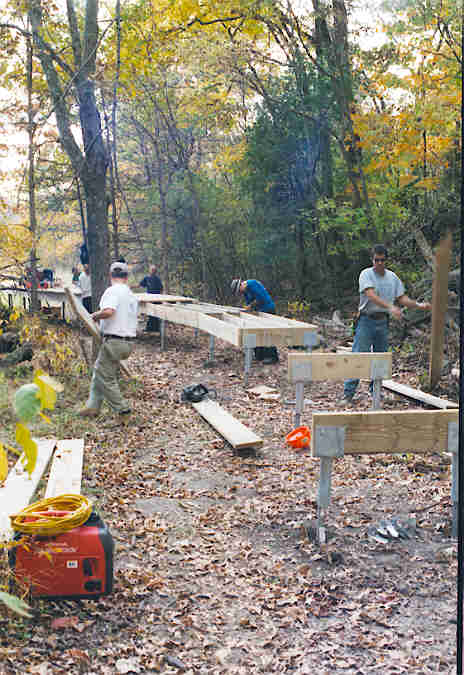
After the piling is cut to height, a saddle piece attached to a sleeve is dropped over the top of the exposed end. This saddle will hold a doubled up pair of 2x10's as a beam. The beams are bolted to and through the U-shaped saddles in preparation for the joists.

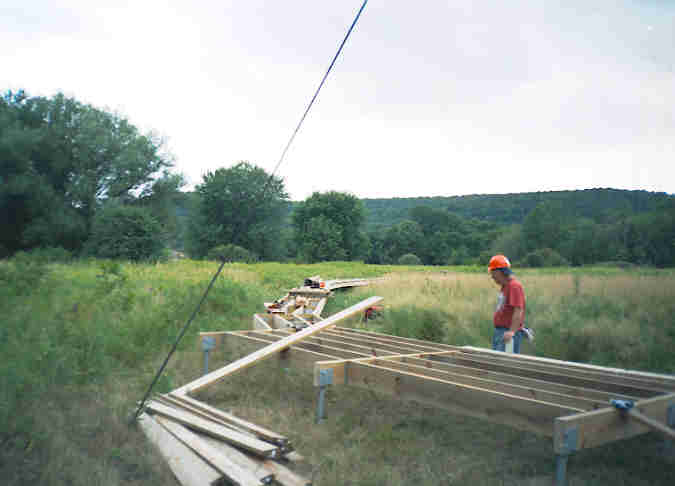
Here you see a number of finished beams ready for the joists. Most of the beams are 4' long, but the ones closest to you in this picture are 8' long. They are for one of the periodic turnouts, or passing areas, along the course of the boardwalk.

At the end of the day, the pilings are all in place for this section, and the beams are ready for the joists. The beams are 10' apart.
Conventional joist hangers are used to place the joists on the beams. Each joist has to be custom cut because (let's face it) the dimensions between the beams are 'variable'. Also, the boardwalk curves and bends as it goes, so the framework has to be cut to make that happen in the structure, also.
Here you can see the framework taking shape. This is from the south end of the bridge, and the wide, passing area is just before the connection to the bridge's staircase (not yet in place).
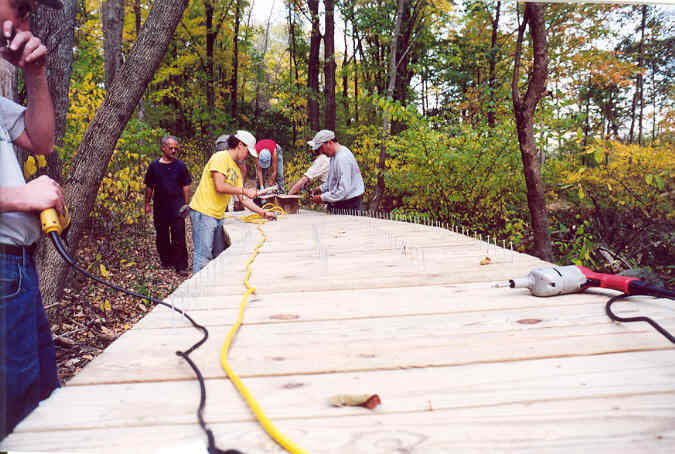
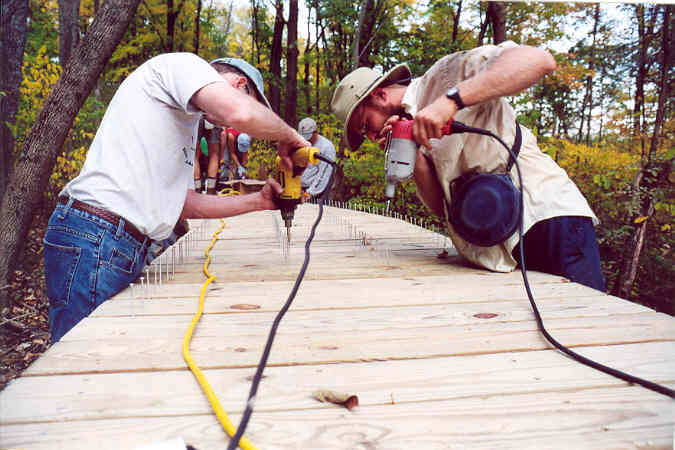
Once the framework is completed, the decking can be put down. The deck boards are placed 1/2" apart, then minimally nailed down. Where the deck has to bend, the boards are cut long-ways into a series of wedges which form a kind of 'fan' pattern, which follows the curve of the pathway. Once all the decking has been placed and tacked in place, each deck board is then drilled and screwed twice into each beam crossing. After driving the pilings, the drilling and screw driving were the most grueling tasks. Not that they were so difficult, but they required you to work either on your knees or bent from the waist to work the drill and screw-gun.

And here it is! The connector to the bridge staircase is in place and all the decking is down. All that remains in this section is the 2x3 'curbing' which will be placed at the edge and screwed down.[photo: Monica Resor]


Spring & Summer 2002 Once again, into the fray. This time, there's a deadline... the opening ceremony is scheduled!!!
This season is about finishing up the final deck sections, creating ramps to transition from the boardwalk down to the conventional treadway. Once completed, the "farmer's bridge" will also require a full railing, since it is quite high above the ground and water where it crosses the channel.
The NY/NJ Trail Conference's West Jersey and North Jersey crews, along with folks from the ATC and The NJ Builder's Association worked many, many weekends throughout the year. Everybody was pushing for the conclusion of nearly 20 year's planning and work.

Once again, the first step is always getting the materials and tools to the site. Here, Monica poses with one of the roughly 1600 joists. Everybody who worked on this project -- top to bottom -- did 'tote duty' at one time or another. At times, the strains of "the ants go marching two by two..." could be heard drifting across the bog.


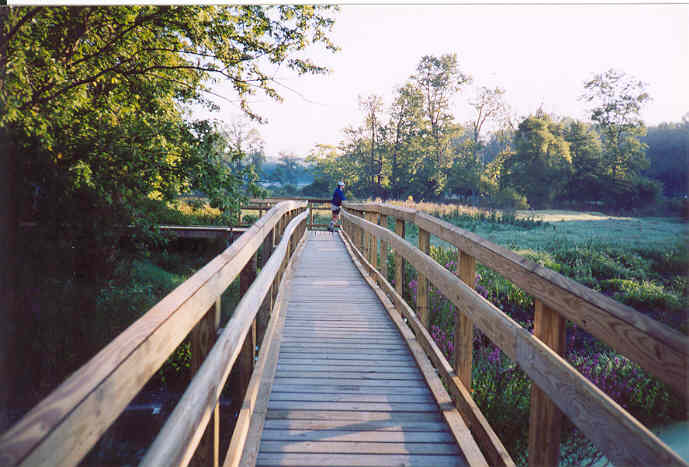
Nice bridge! That's David on the southern end, checking out the bog turtles at sunrise on one of the summer 'double-header' weekends. We camped on-site to monitor the equipment, to avoid loosing the time needed to move it all in to the worksite every morning. It could take as long as a half hour per round trip from the vehicles -- you'd loose half a day's time, just getting ready to work. [photo: Monica Resor]


Please -- if you have the opportunity to do so, come to this amazing place; and if you can, spend some time at dawn or dusk and let the swamp work it's magic on you!