Popolopen
Gorge Trail
Harriman
State Park, NY
[
NY/NJ Trail Conference's West Hudson Crew ]
I
think this trail is one of Harriman's lost secret treasures. As trails go, it's
nothing extraordinary - even kind of routine. Largely following an old
roadbed, it runs upstream along the Popolopen river starting just off the Bear Mountain
traffic circle. With no trail head parking, access at this end is
problematic (which I think is why it seems to be much less used than many others
in the park).
But the gorge is quite the gem! In the high water seasons
it is one of the most dramatic watercourses I have seen. At low water, the pools
and water-carved stones are a study in peaceful persistence. Check out the
NY/NJ Trail Conference's map #4 (North Harriman set) for the trailhead.
Here
are some photos from the trail reconstruction this Spring along the Popolopen
Gorge Trail in Harriman. Once again, the NY/NJ Trail Conference's West of
Hudson Trail Crew had a great crew of volunteer men & women working on
this. Work remains - so contact the leader if you'd like to join in.
Check the "West of Hudson Crew" schedule on the NYNJ Trail Conference website.
Last Updated: 01/30/2005
 |
Spring
2001
Repair
in place of some sections where the steep walls of the gorge have declined
to the point where the trail had become eroded and unsafe. |
 |
As
you hike upstream, about a third of a mile along you get to where this
first part of the repairs begin. This lower section was simply
eroded to the point where there was hardly any trail at all. The
silty soil is very easily washed away, and this area has had plenty of
time to work at it. So, first we cut a side hill several feet back
into the hill to re-establish a tread area. Then we placed periodic
rock steps to support the slope and to keep the terracing from being to
steep. |
 |
The
side hill / stepped terrace process morphs into a rock stair as the hill
gets steeper. Of course, there were no rocks worth using anywhere
nearby, let alone up hill. So all these had to be mined from the
riverbed, 35' below and dragged up. The local granite is amazingly
heavy! I am told that it is around a 'specific gravity of 5' (which
translates to about 200 pounds per cubic foot). At that rate a
basketball sized chunk weights about 180 lbs. |
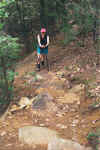 |
When
all is said and done, looking down from near the top of the lower work
area. These photos were taken just a couple weeks after the work was
finished. Already the trail is blending back into the 'natural'
landscape. You can never completely hide trailwork, but the best is
when folks don't even pay attention to it being there... |
 |
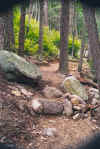
At
the top of the lower section, the trail mostly levels off for 75-100
feet. Here, the crew placed a couple of rock steps to transition
from the stair below, onto the level area. Then major side hilling
was done, again, cutting back into the hillside to create a new shelf /
platform for the tread to occupy. Given the tendency for erosion,
even this fairly flat area needed occasional steps to keep the overall
slope from getting too steep. |
 |
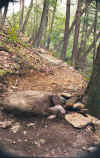
One
of the terracing steps along the way. This is also a textbook
illustration of how to do a side hill. By defining where the tread
level is to be at the outer edge and cutting back into the hill, all the
exposed tread surface is undisturbed, fully compacted soil. As the
cutting back is done, it rises slightly to give about 1 to 2 inch rise in
3 feet of width. Just enough to keep the water sheeting off the
tread, but not so severe as to create a hardship for walking. When
you can do a side hill like this, you rarely need to re-enforce the lower
edge, except when the soil is very poor. |
 |
A
little further along, and the out slope of the hill is so steep, that the
side hill is re-enforced in sections. Ideally, you do this exactly
the same way as a regular one, except that you first dig in and plant a
'curb' of stones (or logs, if you must) so that their tops are even or
just below the desired outside edge level. Then, you cut back the tread
surface the same way as normal. This way, you have the hardened
curbing to help hold the lower edge together, but it does not create an
obstruction to the free sheeting of water off the trail. Anything
that sticks up on that lower edge will keep water on the trail, promoting
erosion -- which was the problem in the first place! |
 |
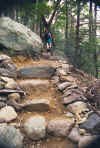
At
one point, the trail ducked sharply uphill and around the back of a large
boulder. The problem is that over the years this had eroded into a 6
foot high mud cliff with a few scraggly roots to clamber up by. The
repair here was to relocate the tread and remediate the damaged
area. Since the relocation had to go steeply up and around below the
boulder, a staircase was the only safe and durable solution. The
masterpiece you see here is the result. You can just barely make out
the damaged area. (Its at the left edge, just below the boulder,
about 2/3 of the way up the stairs.) |
 |
Wow!
Remember the 180 pound basketball? These steps are probably 500-600
pounds apiece. Many of them came from above the work site, but all had to
be brought in by hand.
Ron, Chris, Brian - beautiful job,
guys!
|
 |
And
finally, the stairs bring you up to a built terrace which swings around
the under edge of the boulder and rejoins the original treadway via a
couple of rock steps. |
 |
More
of the side hill work that required occasional terrace steps and a
re-enforced edge. In truth, the rocks along the outer edge are as
much for effect. The hill below here falls away very sharply to the
river, and most people just feel better about having a defined edge. |
 |
Isn't
this pretty? Before, you could hardly find it at all, now it just
flows with the hillside. |
 |
Here
the trail swings past this large tree's root. When you are working
on this steep a hillside, you use all the help you can get to keep the
trail on the hill. Tree, grass and brush roots are what hold a
hillside together better than anything else. Avoiding walking over
them will preserve the tree. |
 |
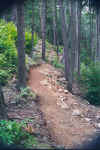
Again
from the textbook side hill: Notice the uphill edge of the treadway is
back sloped at about a 45º angle, sometimes bolstered with embedded flat
rocks. This will slow down the collapse of the uphill side onto the
tread. |
 |
The
crew cut in close to 500 feet of side hill trail along this section in one
day. Talk about working like beavers! (or is it gophers?) |
 |
What
was once an impassable mess of an eroded away hillside is now a safe,
pleasant trail which will hopefully be enjoyed by many, many people. |
 |
Looking
back down at the newly refurbished trail from the end of the project
area. At this point the trail rejoined an old fire road which is in
very good shape at that point. |
 |
Fall
2001
More
to come: The NY/NJ Trail Conference's West of Hudson
crew will be back there in October. There is tons of work to be
done. Come on out and join the fun!
|
 |
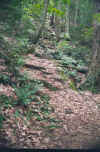
This
is one time when I got 'before' pictures of where we will be
working. Believe it or not, this is looking down the hill along the
marked trail. It goes right down the center of this picture. |
 |
The
same stretch of trail, this time looking up from the bottom. |
 |
I
promise, there really is a trail in there... at least the trees
have blazes on them... |
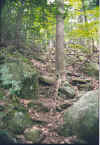 |
You
are standing on the trail, looking up. That blow-down in the
background is just below where the trail turns a hard right and crosses a
wash caused by a highway storm drain on the PIP. |
 |
A
side view of the pictured area from above. It's all at least this
steep, and this rocky. |
 |
Once
you cross the wash, the trail continues to traverse across and up the
hill. This will all need to be side hilled, probably with several
steps and terraces along the way. |


